Español
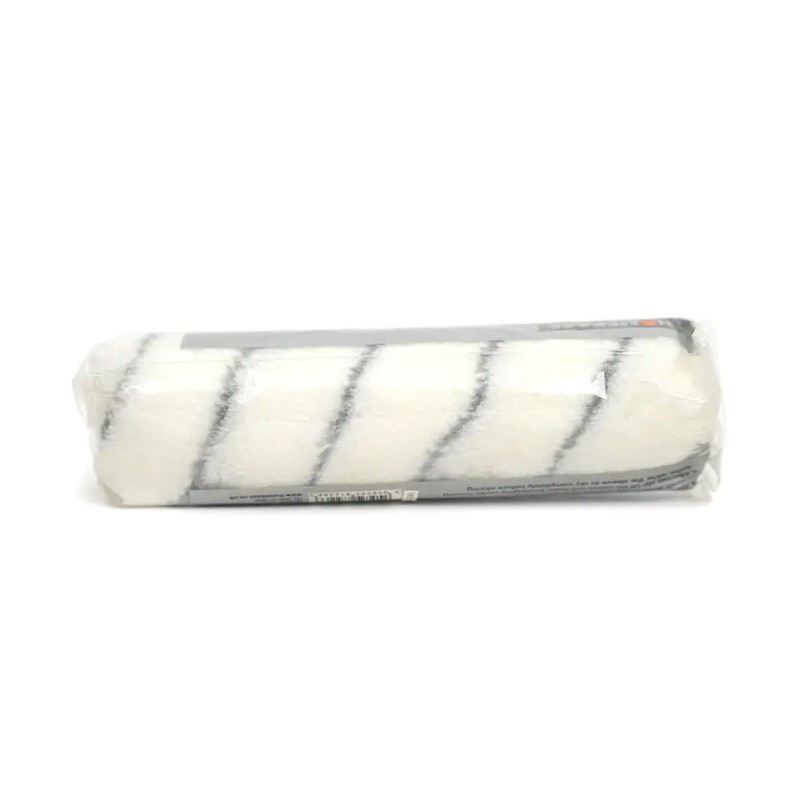
A paint tool kit is a curated set of tools and accessories covering the three key stages of any painting project: surface preparation, paint application, and finishing and cleanup. A complete kit typically includes paint brushes, roller frames and covers, a roller tray, painter's tape, drop cloths, a paint scraper, sandpaper, a mixing stick, and a paint can opener — with more comprehensive kits adding extension poles, edge guides, putty knives, and cleaning tools. Having the right items in one kit eliminates mid-project trips to the hardware store and ensures a professional-quality result from start to finish.
Content
- 1 Surface Preparation Tools
- 2 Paint Application Tools
- 3 Paint Mixing and Handling Tools
- 4 Protective Equipment Included in Paint Kits
- 5 Finishing and Cleanup Tools
- 6 What a Standard Kit Contains vs. a Professional Kit
- 7 Choosing a Paint Tool Kit Based on Your Project Type
- 8 Tips for Getting the Most Out of Your Paint Tool Kit
Surface Preparation Tools
Proper surface preparation accounts for the majority of a paint job's final quality. Skipping or rushing preparation is the single most common cause of peeling, bubbling, and uneven finishes. The following tools are essential in this stage:
Sandpaper and Sanding Blocks
Sandpaper roughens smooth surfaces to improve paint adhesion and smooths rough or repaired surfaces before painting. Most paint tool kits include a range of grits — typically 80-grit for heavy material removal, 120-grit for general surface preparation, and 220-grit for fine finishing between coats. A sanding block or sanding sponge holds the sandpaper flat and prevents uneven pressure that creates dips in the surface.
Paint Scraper
A paint scraper removes loose, flaking, or peeling paint from surfaces before new paint is applied. Standard scrapers have a 75 mm to 125 mm wide steel blade with a comfortable handle. Applying new paint over unstable existing layers is a primary cause of premature failure, making the scraper one of the most important tools in any kit.
Putty Knife and Filler
Putty knives are used to apply filler or spackling compound to cracks, nail holes, and surface imperfections before painting. Blade widths of 50 mm to 100 mm are most common in paint kits. A smooth, properly filled surface prevents the shadow of repairs showing through the finished paint layer.
Painter's Tape
Painter's tape (also called masking tape) protects surfaces that should not be painted — skirting boards, window frames, light switches, and ceiling edges. Quality painter's tape is designed to be removed cleanly without lifting the underlying surface finish for up to 14 days after application. Most kits include one or two rolls in a standard 25 mm or 38 mm width.
Drop Cloths and Dust Sheets
Drop cloths protect floors, furniture, and fixtures from paint drips and splashes. Canvas drop cloths are the most durable and reusable option; plastic sheeting is lighter and less expensive but more prone to slipping underfoot. A 3.6 m × 3.6 m canvas drop cloth is a standard size in professional kits and covers most room floor areas adequately.
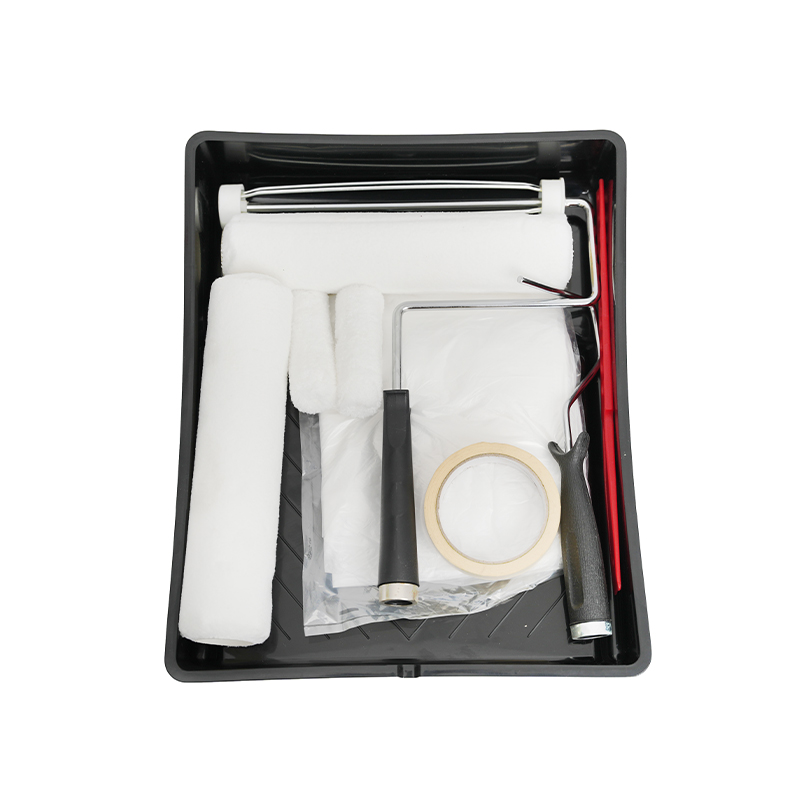
Paint Application Tools
The application tools in a paint kit determine the quality, speed, and finish of the painted surface. Different tools suit different surfaces, paint types, and areas of a room.
Paint Brushes
Paint brushes are indispensable for cutting in at edges, painting trim, and reaching areas a roller cannot access. A complete paint tool kit typically includes multiple brush sizes:
- 25 mm (1-inch) angled sash brush: Fine detail work around window frames, door panels, and narrow trim.
- 50 mm (2-inch) angled brush: Cutting in along ceiling lines, corners, and edges before rolling the main surface.
- 75 mm (3-inch) flat brush: Wide areas of trim, door faces, and skirting boards.
Synthetic bristle brushes (nylon or polyester) perform well with water-based paints, while natural bristle brushes suit oil-based and alkyd formulations. Most general-purpose kits include synthetic bristle brushes that work across both paint types.
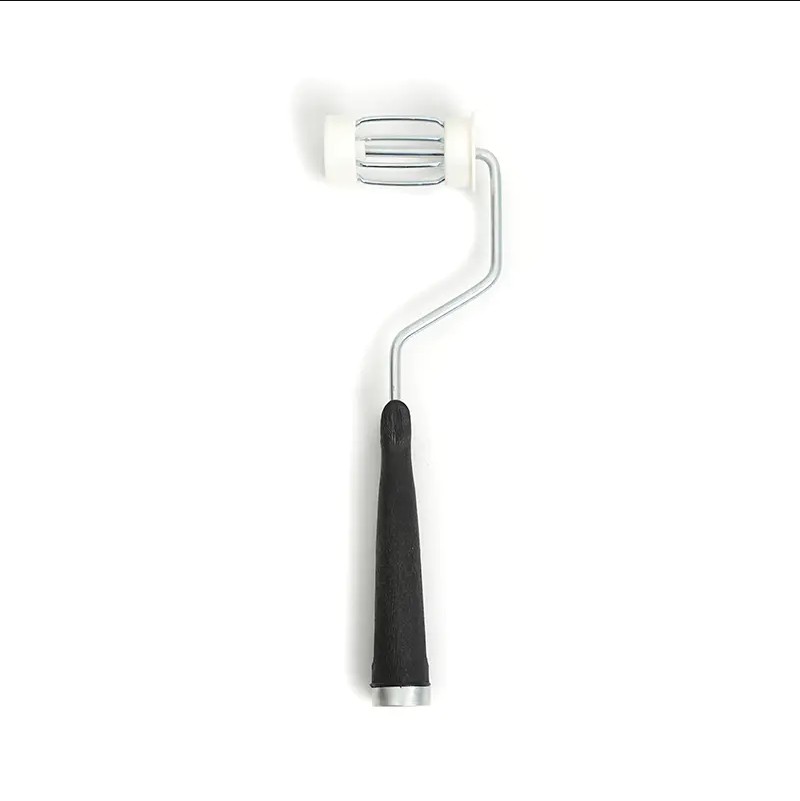
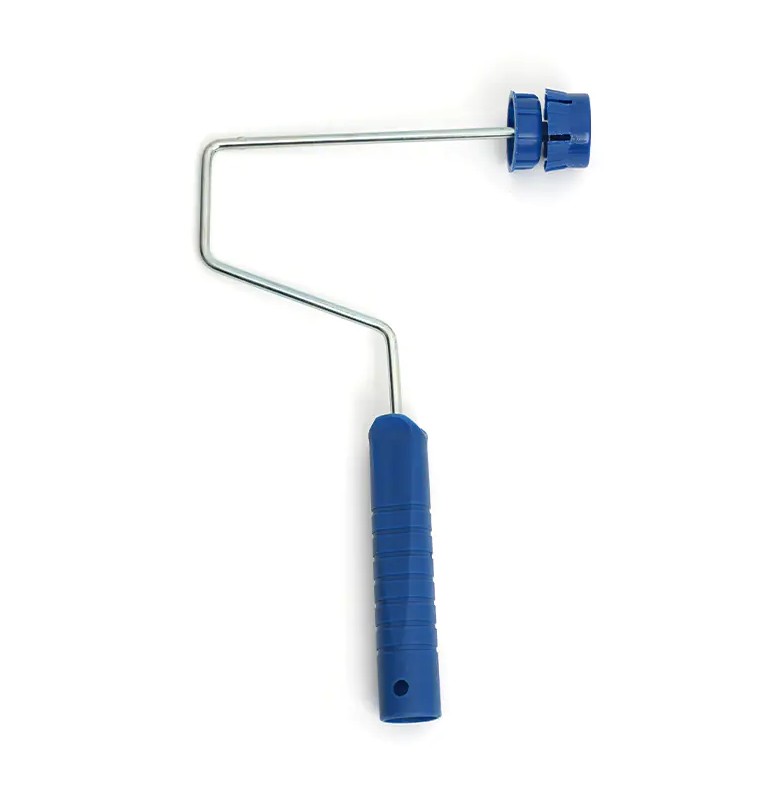
Roller Frame
The roller frame is the metal or plastic cage that holds the roller cover and connects to the handle or extension pole. Standard roller frames accommodate 230 mm (9-inch) covers, which is the most common size for wall and ceiling painting. Mini roller frames in 100 mm (4-inch) sizes are included in some kits for painting behind radiators, in recesses, and on narrow surfaces.
Roller Covers (Sleeves)
Roller covers are the absorbent sleeves that hold and release paint onto the surface. The nap (pile) thickness determines the texture of the finish and the surface type the cover suits:
| Nap Thickness | Best Surface | Finish Result |
|---|---|---|
| 6 mm (1/4 inch) | Smooth walls, ceilings, doors | Very smooth, low stipple |
| 10 mm (3/8 inch) | Lightly textured walls | Slight texture, good coverage |
| 13 mm (1/2 inch) | Semi-rough or textured plaster | Medium texture, excellent coverage |
| 19 mm (3/4 inch) | Rough masonry, brick, concrete | Heavy texture, maximum coverage |
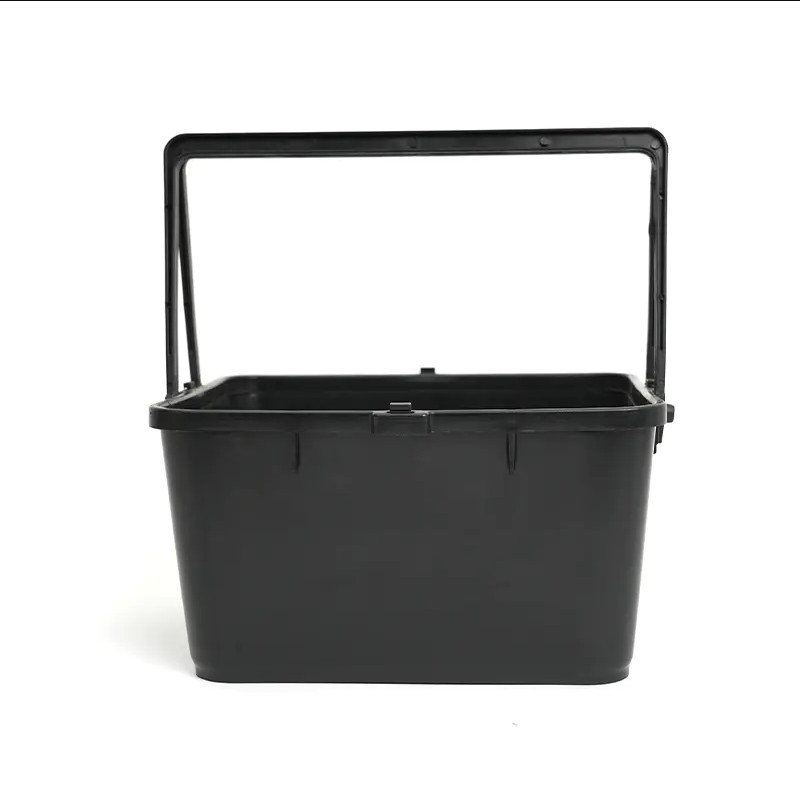
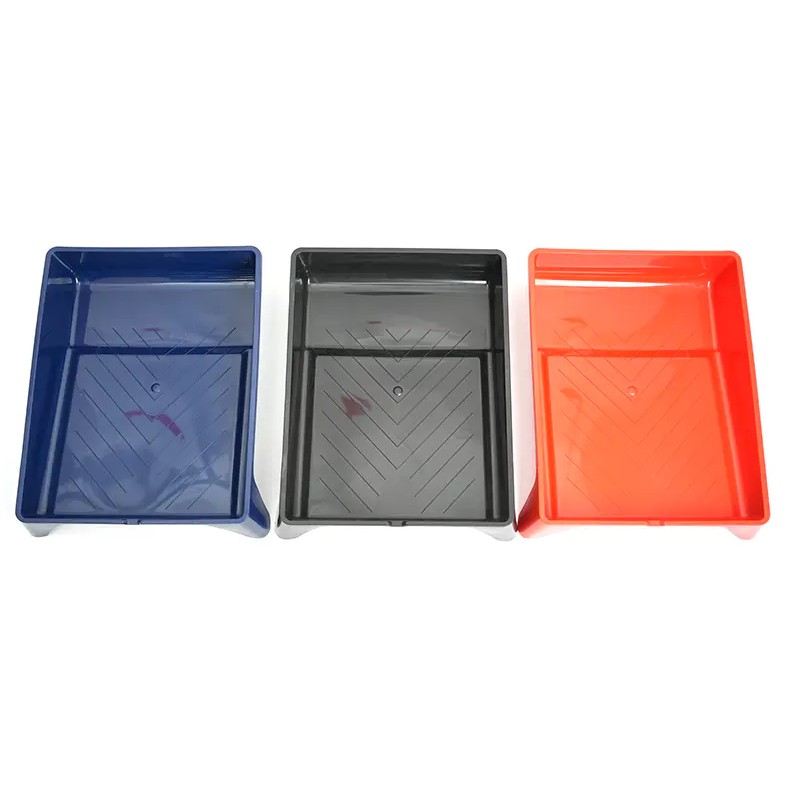
Paint Roller Tray
The roller tray holds paint and provides the ribbed surface (ramp) used to load the roller cover evenly and remove excess paint before application. A correctly loaded roller contains enough paint for a smooth, even coat without dripping. Most kits include a standard 300 mm tray matching the 230 mm roller, with a deeper well for holding more paint and a wider ramp for even loading. Plastic tray liners are sometimes included to make cleanup faster and allow the tray to be reused with different paint colors.
Extension Pole
An extension pole attaches to the roller frame handle via a threaded socket, allowing the user to paint ceilings and high walls without a ladder. Standard extension poles in paint kits extend from 600 mm to 1,200 mm, enabling a typical 2.4-meter ceiling to be painted comfortably while standing. Telescoping poles that extend from 1 meter to 2 meters or more allow floor-to-ceiling coverage in a single pass.
Paint Pad and Edge Guide
Paint pads are flat, foam-faced applicators that cut in cleanly along ceiling lines and edges. Many kits include a dedicated edging pad with a guide wheel — a small roller that runs along the ceiling or adjacent surface while the pad applies paint precisely to the wall edge, reducing the need for masking tape on long straight runs.
Paint Mixing and Handling Tools
Before any paint touches a surface, it needs to be properly opened, mixed, and transferred — tasks that require specific tools often included in paint kits.
Paint Can Opener
A paint can opener (also called a lid key) is a small lever tool used to pry open the tight lid of a metal paint can without damaging the lid or the sealing rim. Attempting to open a can with a screwdriver or knife bends the rim and prevents the lid from resealing properly — a common cause of paint skinning over during storage.
Mixing Sticks and Paddle Mixers
Paint settles in the can during storage, with heavier pigments sinking to the bottom. Mixing sticks — flat wooden or plastic stirrers — are used to blend the paint thoroughly before and during use. Many kits include wooden mixing sticks for hand stirring; larger kits may include a drill-attachment mixing paddle for efficiently stirring 10-liter or larger containers where hand stirring is impractical.
Paint Bucket and Pouring Spout
A dedicated paint bucket (often a smaller, handled container of 2 to 5 liters) allows the painter to decant working quantities from a large can, keeping the main supply sealed and reducing waste. Some kits include a flexible pouring spout that fits over the rim of a standard paint can to control flow when decanting into smaller containers or roller trays.
Protective Equipment Included in Paint Kits
Many complete paint tool kits include basic personal protective equipment (PPE) to protect the user from paint splashes, dust, and fumes:
- Disposable gloves: Latex or nitrile gloves protect the hands from paint and solvent contact. Nitrile gloves offer better chemical resistance for solvent-based products.
- Dust mask or respirator: A basic dust mask (FFP1 or FFP2 rated) protects against sanding dust during surface preparation. For oil-based paints and solvents in enclosed spaces, a half-face respirator with organic vapor cartridges is recommended.
- Safety glasses or goggles: Protect eyes from paint splatter when rolling overhead or working with spray equipment.
- Disposable coveralls or painter's apron: Protect clothing from paint contact during application.
Finishing and Cleanup Tools
The finishing and cleanup stage is as important as preparation and application for a long-lasting, professional result. Paint kits designed for repeat use include tools specifically for this stage.
Brush and Roller Cleaner / Spinner
A brush and roller spinner (also called a centrifugal cleaner) uses a hand-pumped spinning mechanism to fling water or solvent out of bristles and roller covers rapidly during cleaning. It reduces cleaning time from 10–15 minutes to 2–3 minutes per roller and extends the service life of brushes and rollers by removing embedded paint before it cures. Some kits include a bucket-mounted spinner that spins the roller inside a lidded container, preventing water from spraying the surrounding area.
Brush Comb
A brush comb is a metal or plastic tool with fine tines used to straighten and separate brush bristles during and after cleaning. Regular combing during cleaning prevents bristles from clumping, drying deformed, or becoming permanently splayed — which would render the brush unusable for fine cutting-in work. A well-maintained brush cleaned and combed after each use can last for dozens of painting sessions.
Cleaning Cloths and Sponges
Absorbent rags or microfiber cloths are used to wipe down surfaces before painting, clean up drips and splashes immediately, and wipe tools during cleanup. Sponges damped with water are effective for removing fresh water-based paint from unintended surfaces before it dries.
What a Standard Kit Contains vs. a Professional Kit
Paint tool kits are sold at different specification levels, broadly divided into standard DIY kits and professional contractor kits. Understanding the difference helps buyers select the right level of investment.
| Item | Standard DIY Kit | Professional Kit |
|---|---|---|
| Paint brushes | 2–3 sizes, synthetic bristle | 4–6 sizes, premium synthetic or natural bristle |
| Roller frame and covers | 1 frame, 1–2 covers (230 mm) | 2 frames, 4–6 covers (multiple nap sizes) |
| Extension pole | Basic 600–1,200 mm fixed pole | Telescoping 1–2 m, heavy-duty threaded fitting |
| Painter's tape | 1 roll (25 mm) | Multiple rolls (25 mm, 38 mm, 50 mm) |
| Drop cloth | Plastic sheeting | Heavy canvas, multiple sizes |
| Roller cleaner / spinner | Not typically included | Included — bucket-mounted spinner |
| Brush comb | Not typically included | Included |
| Sandpaper assortment | 2–3 sheets (basic grits) | Full range of grits plus sanding block |
| PPE (gloves, mask) | Basic disposable gloves | Nitrile gloves, safety glasses, respirator |
Choosing a Paint Tool Kit Based on Your Project Type
Not every painting project requires the same toolkit. Matching your kit to the scope and surface type of the job prevents overspending on tools you will not use and ensures you have everything you actually need.
- Single room repaint (DIY): A basic kit with a 230 mm roller set, two brush sizes, painter's tape, a drop cloth, sandpaper, a mixing stick, and a can opener covers the essentials. Budget kits at this level are widely available and sufficient for occasional use.
- Full house interior repaint: A mid-range kit adding an extension pole, edging pad, brush comb, roller spinner, and multiple roller covers in different nap sizes saves significant time and improves the result across varied surface textures.
- Exterior masonry painting: Requires a thick-nap roller (19 mm), a wide scraper and wire brush for preparation, exterior-grade painter's tape, heavy canvas drop cloths, and a respirator — items absent from most basic interior kits.
- Professional decorating contractor: A full professional kit including multiple frame and cover sets, heavy-duty telescoping poles, full PPE, a brush spinner, and a comprehensive brush range allows efficient work across multiple simultaneous jobs with fast tool turnaround.
Tips for Getting the Most Out of Your Paint Tool Kit
Owning a good paint tool kit is only part of the equation — proper care and use of each item maximizes performance and extends the life of every tool in the set.
- Clean tools immediately after every use. Water-based paint left in a roller or brush for more than 30–60 minutes begins to cure and becomes significantly harder to remove. Immediate cleaning in warm water extends tool life dramatically.
- Store brushes hanging or lying flat. Storing brushes standing on their bristles deforms the tips permanently. Hang brushes from the handle hole or lay them flat in a drawer between uses.
- Wrap rollers and brushes in plastic wrap for short breaks. If stopping for up to 24 hours between sessions, wrapping tools tightly in cling film or a plastic bag prevents drying without requiring a full clean.
- Replace roller covers rather than over-cleaning them. Roller covers are relatively inexpensive; once nap fibers are damaged or embedded with dried paint that cannot be removed, replacement is more cost-effective than continued cleaning.
- Use painter's tape in sections no longer than 500 mm. Applying tape in shorter overlapping sections creates a better seal at edges and prevents paint bleeding under the tape at long straight runs.
- Inspect tools before each project. Check bristles for splaying, roller covers for embedded debris, and handles for cracks before starting work — discovering a damaged tool mid-project wastes time and can compromise the finish.